CentOS7でUSB/IPを有効にする
CloudStackのVMでサーバーに繋いだUSB機器を使いたいが、
USBパススルーが難しいっぽいので、USB/IPを入れた手順のメモ。
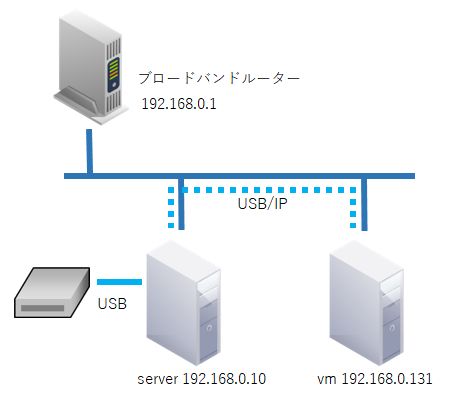
構成は、自宅CloudStackのサーバーに繋がったUSB機器をUSB/IPを通してvm(windows)で使用する。
– 手順 –
1.カーネルをUSB/IPモジュールを有効にしてビルドする
①ビルドツールを入れる
|
1 2 3 |
#yum -y install rpm-build redhat-rpm-config asciidoc hmaccalc perl-ExtUtils-Embed pesign xmlto #yum -y install audit-libs-devel binutils-devel elfutils-devel elfutils-libelf-devel #yum -y install ncurses-devel newt-devel numactl-devel pciutils-devel python-devel zlib-devel |
“Development tools”を入れていない場合は入れる
|
1 |
#yum -y groupinstall base "Development tools" |
②ソースをダウンロード
カーネルを確認して、
|
1 2 |
#uname -r 3.10.0-514.6.1.el7.x86_64 |
http://vault.centos.org/7.3.1611/updates/Source/SPackages/から同じのをダウンロードした。
|
1 |
#rpm -i http://vault.centos.org/7.3.1611/updates/Source/SPackages/kernel-3.10.0-514.6.1.el7.src.rpm 2>&1 | grep -v exist |
③ソースの展開
|
1 2 |
#cd ~/rpmbuild/SPECS #rpmbuild -bp --target=$(uname -m) kernel.spec |
④ソースディレクトリへ移動
|
1 |
#cd ~/rpmbuild/BUILD/kernel-3.10.0-514.6.1.el7/linux-3.10.0-514.6.1.el7.x86_64/ |
⑤現在のカーネル設定をコピー
|
1 |
#cp /boot/config-$(uname -r) .config |
⑥設定を修正
|
1 2 |
#make oldconfig #make menuconfig |
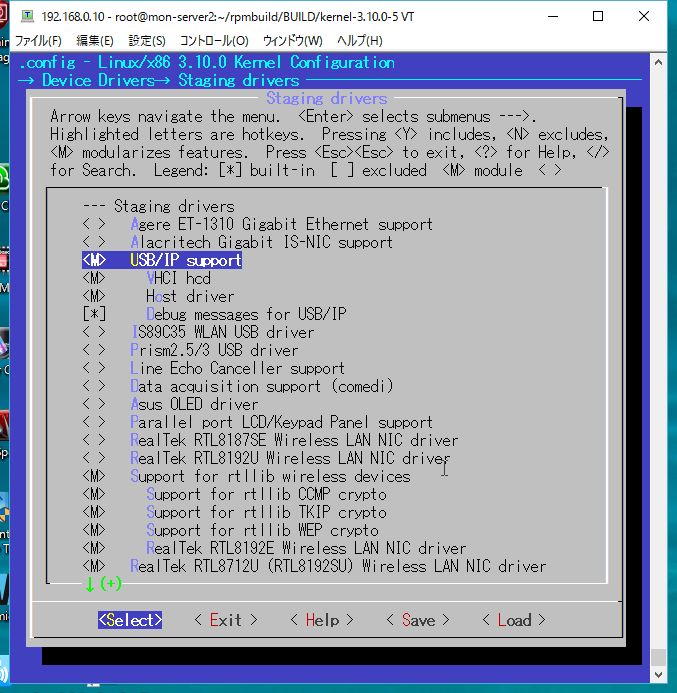
Device Drivers→Staging driversでUSB/IP supportの下を有効にする。
⑦コンフィグをコピーして先頭行に# x86_64を入れる
|
1 2 3 |
#cp .config configs/kernel-3.10.0-x86_64.config #vi configs/kernel-3.10.0-x86_64.config # x86_64 ←先頭行に入れる |
⑧コンフィグを~/rpmbuild/SOURCES/にコピーする
|
1 |
#cp configs/* ~/rpmbuild/SOURCES/ |
⑨~/rpmbuild/SPECSに移動してkernel.specを修正する
|
1 2 3 4 |
#cd ~/rpmbuild/SPECS #cp kernel.spec kernel.spec.distro #vi kernel.spec %define buildid .local ←コメント外す |
⑩ビルド
|
1 |
#rpmbuild -bb --target=`uname -m` kernel.spec 2> build-err.log | tee build-out.log |
1時間かかる。( ´_ゝ`)🍵
⑪インストール
|
1 2 |
#cd ~/rpmbuild/RPMS/`uname -m`/ #yum -y localinstall kernel-*.rpm |
⑫リブート
|
1 |
#reboot |
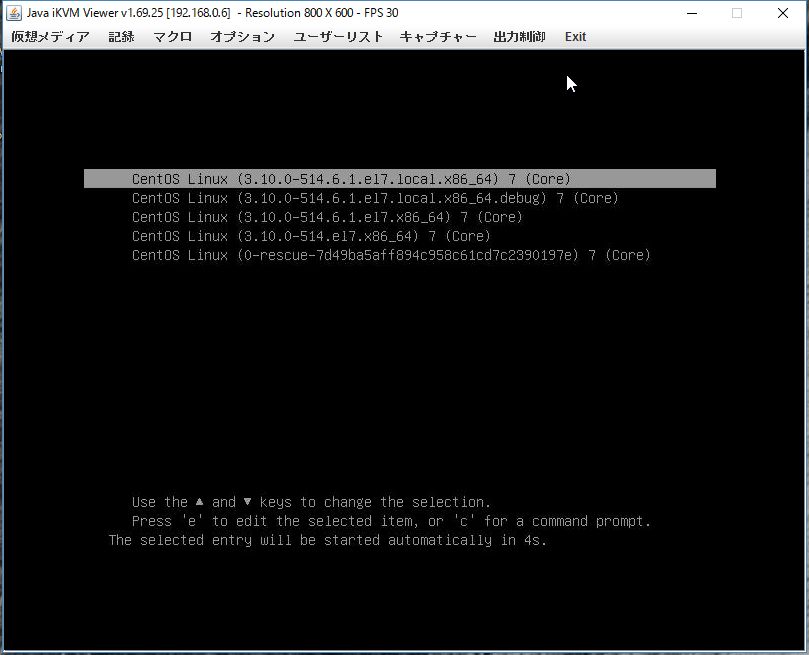
ビルドしたカーネルを選択して起動する。kernel.specのbuildidで指定した.localが付いている。
2.usbipツールをビルドする
①usbipモジュールを有効にする
|
1 2 |
#modprobe usbip-core #modprobe usbip-host |
②libsysfsをもってくる
ここからhttp://rpmfind.net/linux/rpm2html/search.php?query=libsysfs-devel
|
1 |
#rpm -ivh ftp://rpmfind.net/linux/centos/7.3.1611/os/x86_64/Packages/libsysfs-devel-2.1.0-16.el7.x86_64.rpm |
③OSビルドしたディレクトリのusbipツールが入っているディレクトリへ移動
|
1 |
#cd /root/rpmbuild/BUILD/kernel-3.10.0-514.6.1.el7/linux-3.10.0-514.6.1.el7.local.x86_64/drivers/staging/usbip/userspace |
④ビルド&インストール
|
1 2 3 |
#./autogen.sh #./configure #make install |
3.USB/IPの設定
①デーモンの起動
|
1 |
#usbipd -D |
②USB一覧からUSB/IPで公開したい機器を確認
|
1 2 3 4 5 6 7 8 9 10 11 12 13 14 15 16 |
#usbip list -l Local USB devices ================= - busid 1-1 (1774:1002) unknown vendor : unknown product (1774:1002) 1-1:1.0 -> usbhid - busid 1-5 (05e3:0608) Genesys Logic, Inc. : Hub (05e3:0608) 1-5:1.0 -> hub - busid 1-5.2 (045e:0047) Microsoft Corp. : IntelliMouse Explorer 3.0 (045e:0047) 1-5.2:1.0 -> usbhid : : |
③バインド
busid 1-1の機器が公開したいやつなので、バインドする。
|
1 2 3 4 5 6 7 8 9 |
#usbip bind --busid 1-1 #usbip list -r 192.168.0.10 ←確認 Exportable USB devices ====================== - 192.168.0.10 1-1: unknown vendor : unknown product (1774:1002) : /sys/devices/pci0000:00/0000:00:14.0/usb1/1-1 : (Defined at Interface level) (00/00/00) : 0 - Human Interface Device / No Subclass / None (03/00/00) |
これで、サーバー上で公開された。
4.自動起動の設定
①usbip-hostの自動起動
モジュール設定を作成する。
|
1 |
#vi /etc/modules-load.d/usbip-host.conf |
|
1 |
usbip-host |
②usbipdの自動起動
サービスを作成する。
|
1 |
#vi /etc/systemd/system/usbipd.service |
|
1 2 3 4 5 6 7 8 9 10 |
[Unit] Description=usbip daemon After=syslog.target network.target [Service] ExecStart=/usr/local/sbin/usbipd -D Restart = always [Install] WantedBy = multi-user.target |
反映して有効化。
|
1 2 |
#systemctl daemon-reload #systemctl enable usbipd.service |
③usbipのバインドを自動実行
usbをバインドするスクリプト作成。
|
1 |
#vi /home/usbip-bind.sh |
|
1 2 |
#!/bin/bash /usr/local/sbin/usbip bind -b 1-1 |
|
1 |
#chmod 775 /home/usbip-bind.sh |
usbをバインド解除するスクリプト作成。
|
1 |
#vi /home/usbip-unbind.sh |
|
1 2 |
#!/bin/bash /usr/local/sbin/usbip unbind -b 1-1 |
|
1 |
#chmod 775 /home/usbip-unbind.sh |
起動時にスクリプトを実行するサービスを作成。
|
1 |
#vi /etc/systemd/system/usbipbind.service |
|
1 2 3 4 5 6 7 8 9 10 11 12 13 14 |
[Unit] Description=usbipbind After=usbipd.service Before=shutdown.target Requires=usbipd.service [Service] Type=oneshot ExecStart=/bin/bash -v '/home/usbip-bind.sh' ExecStop=/bin/bash -v '/home/usbip-unbind.sh' RemainAfterExit=true [Install] WantedBy = multi-user.target |
反映して有効化。
|
1 2 |
#systemctl daemon-reload #systemctl enable usbipbind.service |
5.クライアントの設定
①ドライバのダウンロード
USB/IP Projectの手順にでてくるドライバはエラーがでたので、パッチ当ててあるやつをダウンロードした。
https://sourceforge.net/p/usbip/discussion/418507/thread/86c5e473/に書いてるhttps://dl.dropboxusercontent.com/u/39506207/usbip.zipをダウンロード。
署名されてないので警告が出る。。
さらにCloudStackのVM(Windows Server 2012)にうまく入らなかったので、同じネットワークのWindows7に入れてみた。
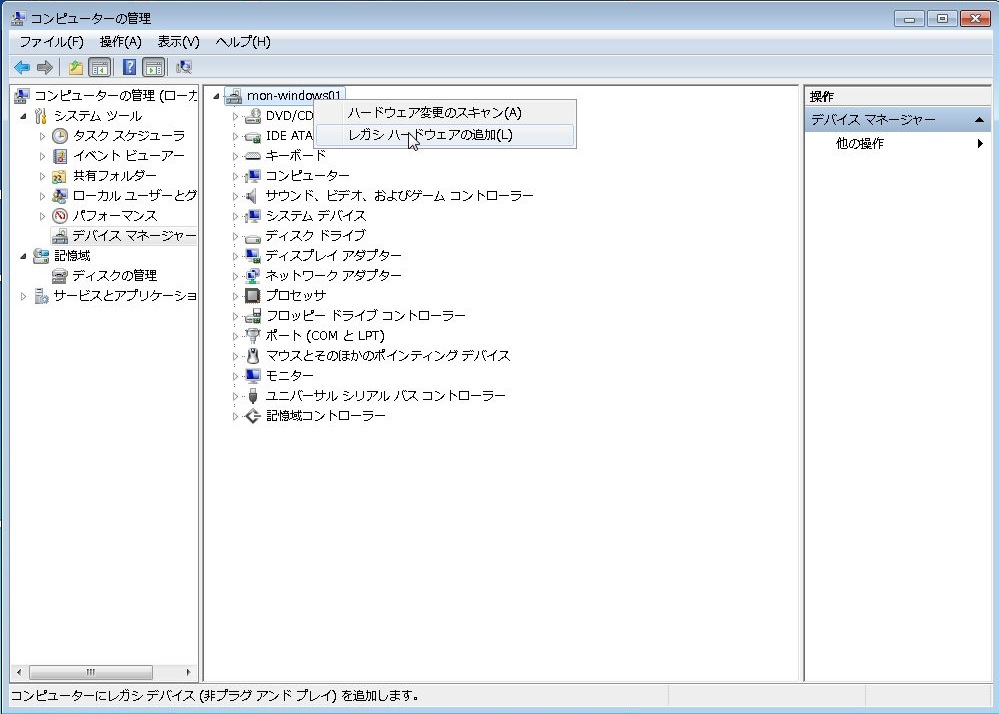
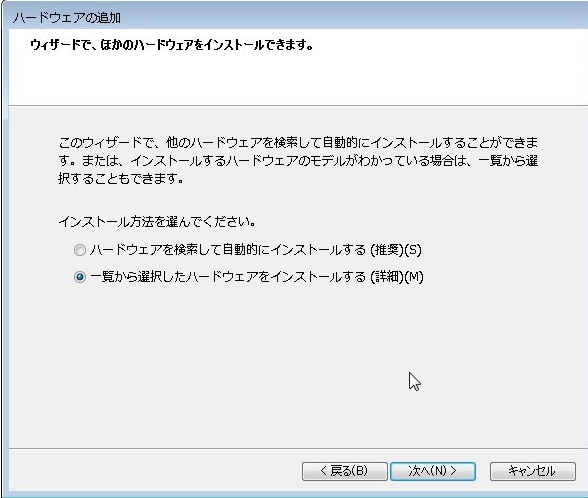
②ドライバのインストール
デバイスマネージャーでレガシーハードウェアをディスクを使用してインストールする。
警告がでる。
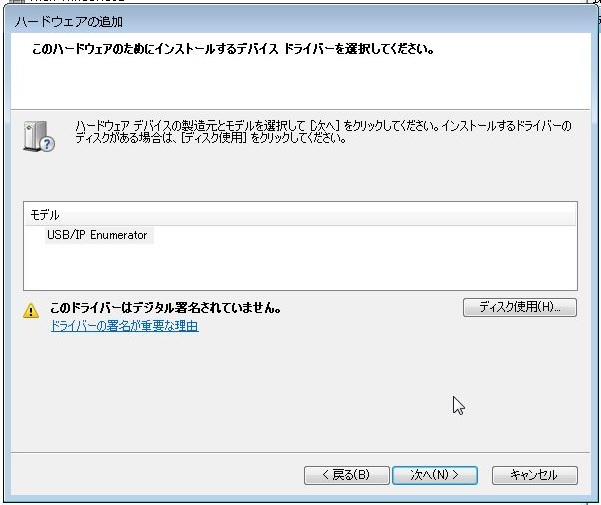

システムデバイスにUSB/IP Enumeratorと表示される

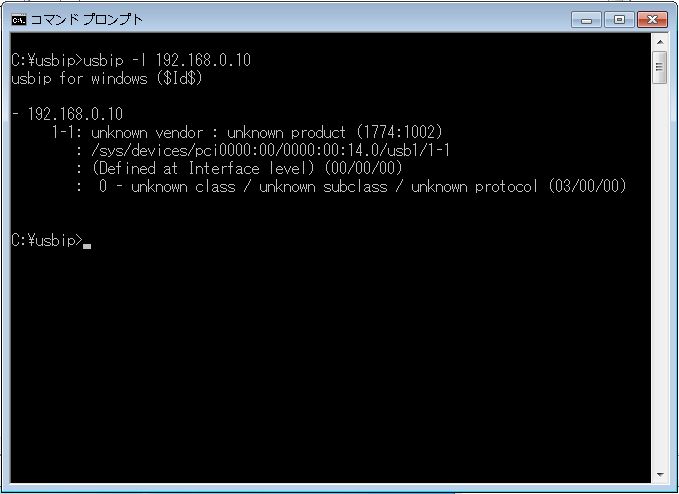
③USB/IPで公開されてる機器にアタッチ
コマンドプロンプトで公開されてる機器を確認
|
1 |
>usbip -l 192.168.0.10 |
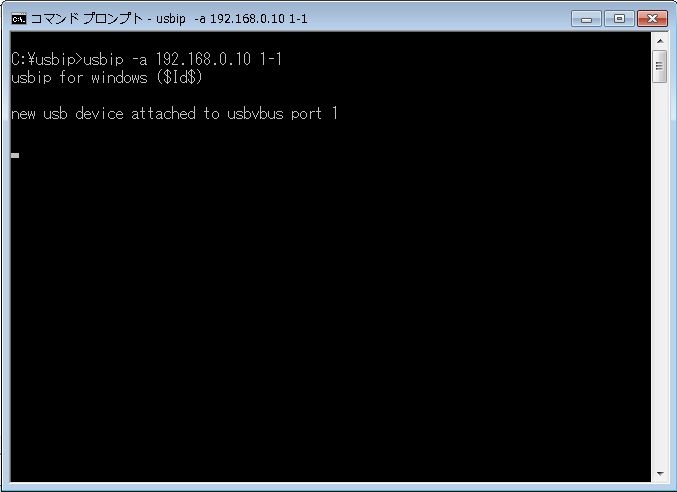
機器にアタッチ
|
1 |
>usbip -a 192.168.0.10 1-1 |
④機器を使うアプリを動かしてみる
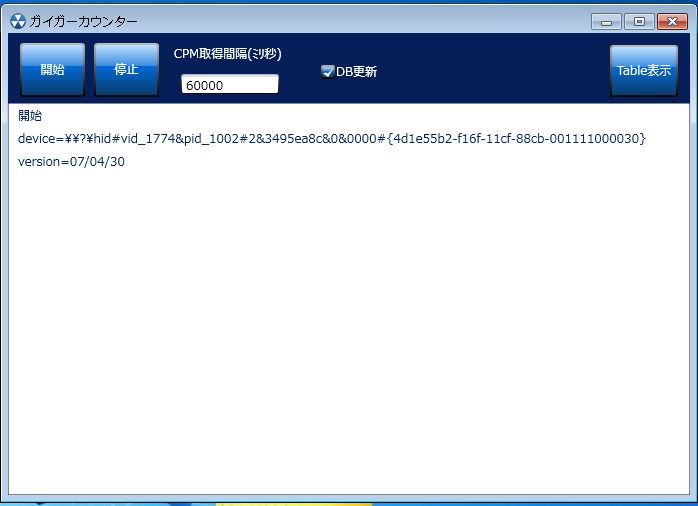
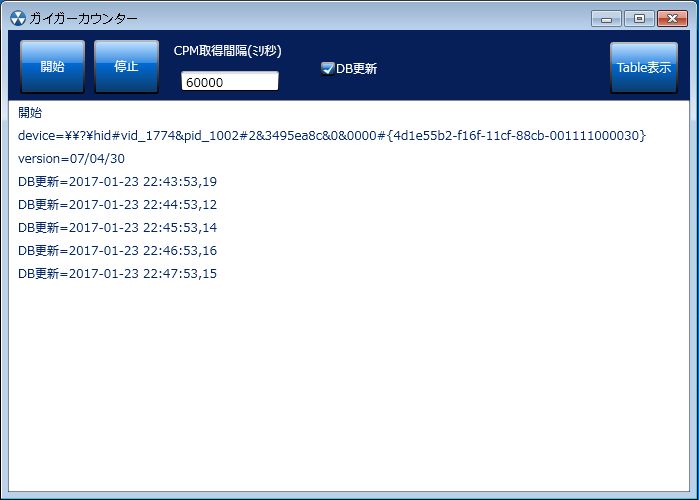
繋がった。(∩´∀`)∩
—
参考サイト
I Need the Kernel Source – https://wiki.centos.org/HowTos/I_need_the_Kernel_Source
I Need to Build a Custom Kernel – https://wiki.centos.org/HowTos/Custom_Kernel
USB/IP Project – http://usbip.sourceforge.net/

- kappa
- Androidで壁紙をランダムに表示する 2023年12月3日
- Excelでソートすると画像がズレる 2022年2月18日
- 分離キーボードその4 2022年1月30日
- 分離キーボードその3 2022年1月22日
- 分離キーボードその2 2022年1月19日